Today we’re going to learn how to play Maj7 chords and how to build them from scratch.
The Major 7th chord is a mesmerising chord which is commonly found in jazz music, but also in pop music and world music it is regularly used to express a beautiful hypnotizing or dream-like sound.
We’re going to look at open Major 7th chords (open strings involved), moveable Maj7 chords (containing no open strings) with the root note located on different strings, starting at the Low E (6th string), A-string (5th string) and the D-string (4th string), and Maj7 bar / barre chords.
First things first, let’s take a look how to build a major 7 chord.
CHORD CONSTRUCTION / ANALYSIS
Major chords consist of the root, 3rd and 5th notes of the major scale (1 3 5). The major 7th chord (Maj7) consists of the root (1), 3rd, 5th and 7th notes of the major scale (1 3 5 7). That means the 7th note of the major scale is added to the major chord.
For example, if you take the notes of the C major scale = C D E F G A B C
The Cmaj7 chord consists of the notes: C E G B (1 3 5 7)
If you take the D major scale = D E F# G A B C# D
The Dmaj7 chord consists of the notes: D F# A C# (1 3 5 7)
This way you can build or analyze any Maj7 chord:
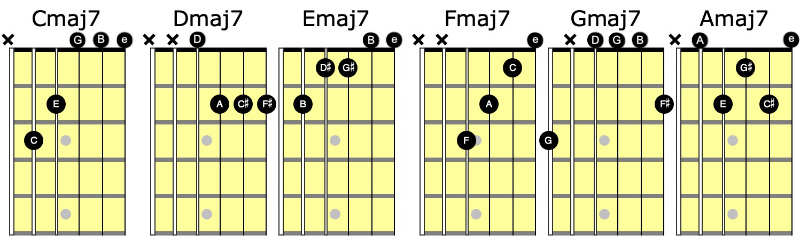
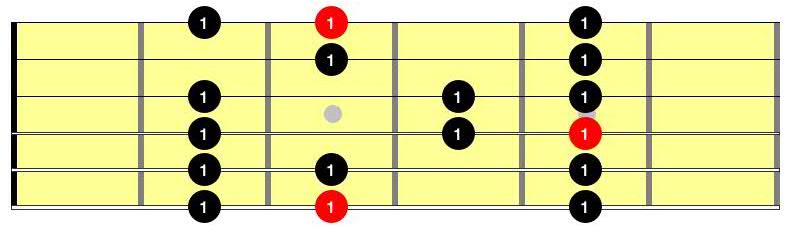
Note: In the chord diagrams above: the black dots above the nut are open strings, and the letters in the dots indicate the note names.
Here are some popular songs that use the major 7 chord:
Old friends by Paul Simon starting with Fmaj7 and Cmaj7, capo on 4th fret.
Something by The Beatles: Amaj7 chord (second chord of the verse)
Maybe tomorrow by Stereophonics: Ebmaj7 chord (first chord of the song) Under the bridge by the Red hot chili peppers: Emaj7 chord (at the end of each verse).